Spring Boot - How to set a Request Timeout for a REST API
Last Updated :
28 Apr, 2025
In Microservice architecture, there are multiple microservices available for an application. For the application to work properly necessary services need to communicate with each other. There can be communication of messaging type or REST calls.
How does REST API Work?
In REST Calls the process is synchronous, which means suppose a service SERV1 is waiting for the response from SERV2 it will wait for an infinite time until it gets the response. Now the problem here is that if for some reason SERV2 is taking way too much time to give a response, so SERV1 keeps on waiting resulting in overall lag in the System or the Application. To overcome this type of situation we use something called Request Timed out. If Timed out time is defined as say 5 seconds, and the repose from a service didn't come in between that time it will wait no further for the response and terminate the process.
If you want to learn more about REST API visit the article on Rest API on GeeksForGeeks.
Steps to set Request Timeout for a REST API
Step 1: Create a Spring Boot Project
To create a spring boot project, go to start.spring.io, create a project with the following configurations, and add the dependencies mentioned.
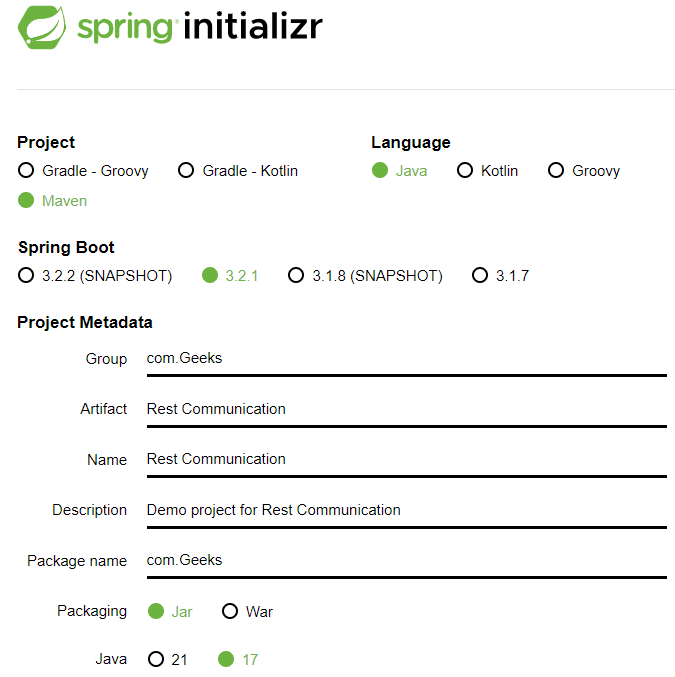
Set Project as Maven, Language as Java, Spring Boot version 3.2.1, Packaging as Jar and Java Version 17.
You can give Name and descriptions of your choice.
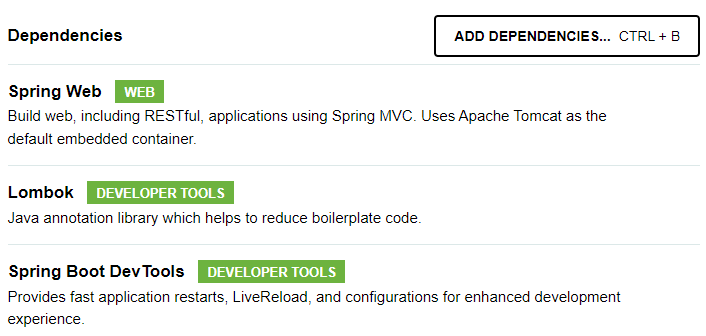
Add depencencies for
- Spring Web
- Lombok
- Spring Boot Dev Tools
Now click on Generate button there to download the project as zip file, once downloaded unzip it.
Step 2: Open the project
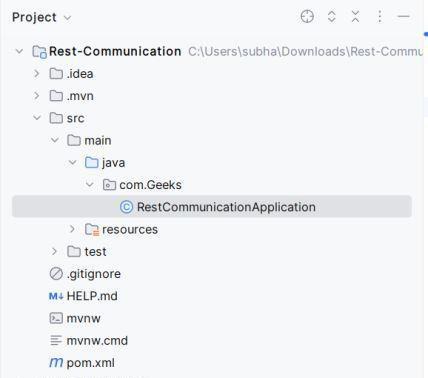
Use any IDE of your choice to open the project folder and wait for some time for the IDE to configure it on it's own.
Note: Here we are using Intellij IDEA IDE.
Check the folder structure below,
Open the pom.xml file and add the following dependency:
<dependency>
            <groupId>org.apache.httpcomponents</groupId>
            <artifactId>httpclient</artifactId>
            <version>4.5.13</version>
</dependency>
Check the pom.xml file below,
XML
<?xml version="1.0" encoding="UTF-8"?>
<project xmlns="http://maven.apache.org/POM/4.0.0" xmlns:xsi="http://www.w3.org/2001/XMLSchema-instance"
    xsi:schemaLocation="http://maven.apache.org/POM/4.0.0 https://maven.apache.org/xsd/maven-4.0.0.xsd">
    <modelVersion>4.0.0</modelVersion>
    <parent>
        <groupId>org.springframework.boot</groupId>
        <artifactId>spring-boot-starter-parent</artifactId>
        <version>3.2.1</version>
        <relativePath/> <!-- lookup parent from repository -->
    </parent>
    <groupId>com.Geeks</groupId>
    <artifactId>Rest-Communication</artifactId>
    <version>0.0.1-SNAPSHOT</version>
    <name>Rest-Communication</name>
    <description>Demo project for Rest Communication</description>
    <properties>
        <java.version>17</java.version>
    </properties>
    <dependencies>
        <dependency>
            <groupId>org.springframework.boot</groupId>
            <artifactId>spring-boot-starter-web</artifactId>
        </dependency>

        <!-- https://mvnrepository.com/artifact/org.apache.httpcomponents/httpclient -->
        <dependency>
            <groupId>org.apache.httpcomponents</groupId>
            <artifactId>httpclient</artifactId>
            <version>4.5.13</version>
        </dependency>


        <dependency>
            <groupId>org.springframework.boot</groupId>
            <artifactId>spring-boot-devtools</artifactId>
            <scope>runtime</scope>
            <optional>true</optional>
        </dependency>
        <dependency>
            <groupId>org.projectlombok</groupId>
            <artifactId>lombok</artifactId>
            <optional>true</optional>
        </dependency>
        <dependency>
            <groupId>org.springframework.boot</groupId>
            <artifactId>spring-boot-starter-test</artifactId>
            <scope>test</scope>
        </dependency>
        <dependency>
            <groupId>org.apache.httpcomponents.client5</groupId>
            <artifactId>httpclient5</artifactId>
            <version>5.2.3</version>
        </dependency>
    </dependencies>

    <build>
        <plugins>
            <plugin>
                <groupId>org.springframework.boot</groupId>
                <artifactId>spring-boot-maven-plugin</artifactId>
                <configuration>
                    <excludes>
                        <exclude>
                            <groupId>org.projectlombok</groupId>
                            <artifactId>lombok</artifactId>
                        </exclude>
                    </excludes>
                </configuration>
            </plugin>
        </plugins>
    </build>

</project>
Now refresh your project to configure the dependency added.
Step 3: Create a Contoller
Let's a create a Rest Controller and name it as geekContoller
GeekController.java:
Java
package com.Geeks;
import org.springframework.beans.factory.annotation.Autowired;
import org.springframework.http.ResponseEntity;
import org.springframework.web.bind.annotation.GetMapping;
import org.springframework.web.bind.annotation.RequestMapping;
import org.springframework.web.bind.annotation.RestController;
import org.springframework.web.client.ResourceAccessException;
import org.springframework.web.client.RestTemplate;
@RestController
@RequestMapping
public class geekController {
    @Autowired
    private RestTemplate restTemplate;
    @GetMapping("/geek")
    public String getGeek(){
        try {
            ResponseEntity<String> response = restTemplate.getForEntity("", String.class);
            return response.getBody();
        }catch (ResourceAccessException e){
            e.printStackTrace();
            return null;
        }
    }
}
Here we have anotated it with RestController anotation, and used @Autowired for automatic object creation for RestTemplate. Here mapping done for "/geek" and we will put the URL of the other service from where we have to recieve response in restTemplate.getForEntity. We have surrounded the response.getBody() with a try and catch block and printing the stack Tree for timeout. You can define what the exception will do in your project.
Now this is the basic rest template which will wait for infinite time for response. Let's make the changes in the RestCommunicationApplication.java file to implement the timeout feature.
RestCommunicationApplication.java:
Java
package com.Geeks;

import org.springframework.boot.SpringApplication;
import org.springframework.boot.autoconfigure.SpringBootApplication;
import org.springframework.context.annotation.Bean;
import org.springframework.http.client.HttpComponentsClientHttpRequestFactory;
import org.springframework.web.client.RestTemplate;

@SpringBootApplication
public class RestCommunicationApplication {
    @Bean
    public RestTemplate restTemplate(){
        HttpComponentsClientHttpRequestFactory httpRequestFactory = new HttpComponentsClientHttpRequestFactory();
        httpRequestFactory.setConnectTimeout(5000);
        return new RestTemplate(httpRequestFactory);
    }
    public static void main(String[] args) {
        SpringApplication.run(RestCommunicationApplication.class, args);
    }
}
Here we have configured the Bean of RestTemplate. This bean class is returning an object where the constructed takes ClientHttpRequestFactory for which we have created one object of HttpComponentsClientHttpRequestFactory class (for which we have added the dependency). We have set the connectTimeout as 5000 which indicates 5sec. In a real aplication, this time will be very less which is in milli seconds.
Step 4: Testing Request Timeout
Create a new Project.
To test if time out is happening or not let's create another spring boot project quickly with the same configuration of the previous one and name it GeekServer.
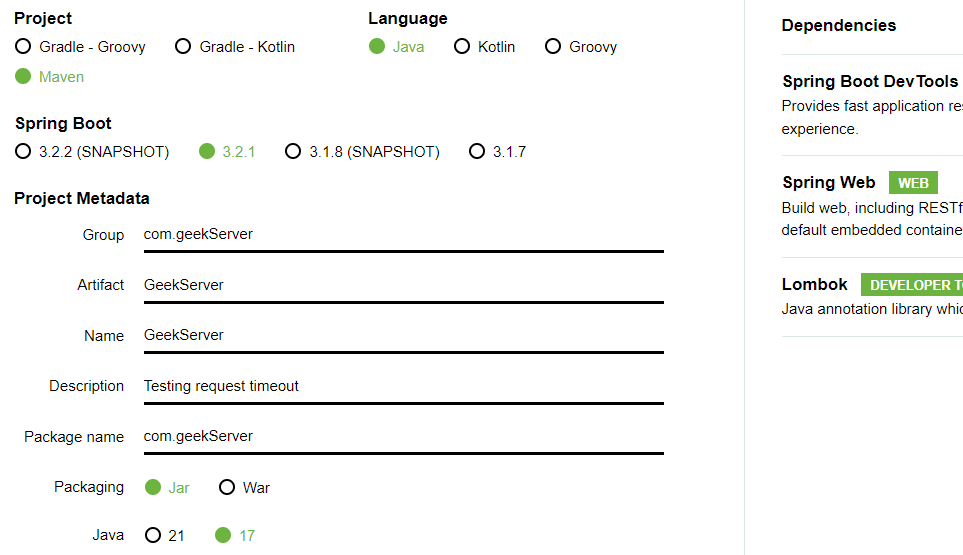
Configure Ports
Open this project in a separate window in your IDE. As our previously application will be running at default port which is 8080. let's change port no for this application in application.properties under resource folder and assign port no 9000 for this.
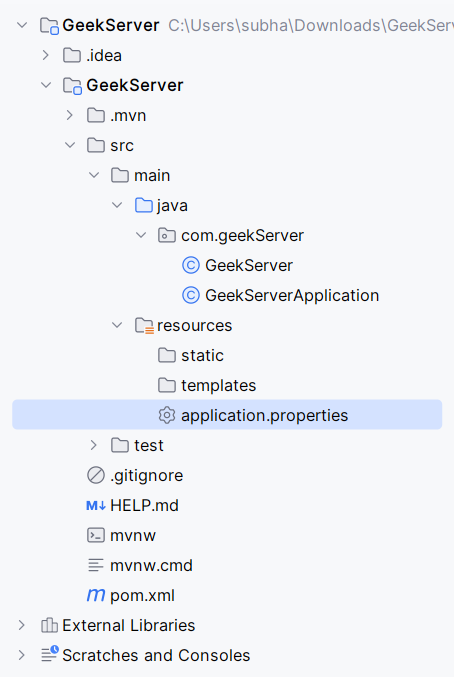
In this file write,
server.port = 9000
Create a Controller
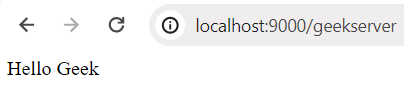
Create a controller and name it GeekServer which will return a message say, " Hello Geek".
GeekServer.java:
Java
import org.springframework.web.bind.annotation.GetMapping;
import org.springframework.web.bind.annotation.RequestMapping;
import org.springframework.web.bind.annotation.RestController;

@RestController
@RequestMapping
public class GeekServer {
    @GetMapping("/geekserver")
    public String getMessage(){
        return "Hello Geek";
    }
}
Run this application and check output
Go to GeekServerApplication and run the project and in your web browser's url bar type localhost:9000/geekserver and check if the controller is working fine.
Configure the Services
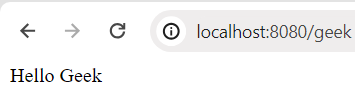
In the RestCoomunicationApplication project's GeekController put localhost:9000/geekserver as URL and check if the same response is coming in that route.
GeekController.java:
Java
package com.Geeks;
import org.springframework.beans.factory.annotation.Autowired;
import org.springframework.http.ResponseEntity;
import org.springframework.web.bind.annotation.GetMapping;
import org.springframework.web.bind.annotation.RequestMapping;
import org.springframework.web.bind.annotation.RestController;
import org.springframework.web.client.ResourceAccessException;
import org.springframework.web.client.RestTemplate;
@RestController
@RequestMapping
public class geekController {
    @Autowired private RestTemplate restTemplate;
    @GetMapping("/geek") public String getGeek()
    {
        try {
            ResponseEntity<String> response
                = restTemplate.getForEntity(
                    "localhost:9000/geekserver",
                    String.class);
            return response.getBody();
        }
        catch (ResourceAccessException e) {
            e.printStackTrace();
            return null;
        }
    }
}
Now run the RestCommunicationApplication project and in web browser check the output at localhost:8080/geek. Keep the other project running on background.
Check Request timeout
Here we have stopped the application running on port 9000, and now try running our application named RestCommunicationApplication.
org.springframework.web.client.ResourceAccessException: I/O error on GET request for "http://localhost:9000/geekserver": Connect to http://localhost:9000 [localhost/127.0.0.1, localhost/0:0:0:0:0:0:0:1] failed: Connection refused: no further information
    at org.springframework.web.client.RestTemplate.createResourceAccessException(RestTemplate.java:905)
    at org.springframework.web.client.RestTemplate.doExecute(RestTemplate.java:885)
    at org.springframework.web.client.RestTemplate.execute(RestTemplate.java:781)
    at org.springframework.web.client.RestTemplate.getForEntity(RestTemplate.java:422)
    at com.Geeks.GeekController.getGeek(GeekController.java:20)
    at java.base/jdk.internal.reflect.NativeMethodAccessorImpl.invoke0(Native Method)
    at java.base/jdk.internal.reflect.NativeMethodAccessorImpl.invoke(NativeMethodAccessorImpl.java:77)
    at java.base/jdk.internal.reflect.DelegatingMethodAccessorImpl.invoke(DelegatingMethodAccessorImpl.java:43)
    at java.base/java.lang.reflect.Method.invoke(Method.java:568)
So, we can observe that our application waited for 5sec and then gave the ResourceAccessException as there is no service running at port 9000.
Check Timeout when there is a delay
To test this let's create a delay of say 10sed on the GeekServer by modifying the GeekServer.java file.
GeekServer.java:
Java
package com.geekServer;

import org.springframework.web.bind.annotation.GetMapping;
import org.springframework.web.bind.annotation.RequestMapping;
import org.springframework.web.bind.annotation.RestController;

@RestController
@RequestMapping
public class GeekServer {
    @GetMapping("/geek")
    public String getMessage() throws InterruptedException {
        Thread.sleep(10000);
        return "Hello Geek";
    }
}
We have added Thread.sleep(10000) which will create a delay of 10sec. Now run both the application and check what happens,
org.springframework.web.client.ResourceAccessException: I/O error on GET request for
"http://localhost:9000/geekserver": Connect to http://localhost:9000 [localhost/127.0.0.1, localhost/0:0:0:0:0:0:0:1]
failed: Connection refused: no further information
at org.springframework.web.client.RestTemplate.createResourceAccessException(RestTemplate.java:905)
We can observe that instead of waiting for an infinite time the Application is throwing exception and timeout is working.
Now we can use this timeout feature in your Spring Boot application to overcome the problem of infinite waiting time and improve the lag in the Application significantly. This will make sure that the application doesn't stop operation and improves stability. We can give significantly lower time frame for timeout and try again after the timeout for better performance, this will not block your tread and system will not go down.
Similar Reads
How to Build a RESTful API with Spring Boot and Spring MVC? RESTful APIs have become the standard for building scalable and maintainable web services in web development. REST (Representational State Transfer) enables a stateless, client-server architecture where resources are accessed via standard HTTP methods. This article demonstrates how to create a RESTf
7 min read
How to set timeout for ajax by using jQuery? In web programming, the Ajax is used so that the resultant data is shown in the one part of the web page, without reloading the page. The user needs to perform the Ajax request and wants the result within a timeframe. In this scenario, the jquery timeout feature is used in the code. Session timeout
4 min read
How to Solve 403 Error in Spring Boot Post Request? Spring Boot is one of the frameworks used in developing web applications, and it provides a lot of features to solve real-time problems in software industries. In this article, we will explain how to solve the 403 error in the Spring Boot post request. This error is raised due to security configurat
6 min read
Easiest Way to Create REST API using Spring Boot Spring Boot is a powerful framework that makes it easy to create RESTful APIs. Creating a REST API using Spring Boot is one of the fastest and simplest ways to develop scalable and production-ready web services. Spring Boot simplifies REST API development by providing built-in features such as autom
10 min read
Securing Spring Boot API With API Key and Secret In Web applications, securing the APIs is critical. One of the common methods of securing the APIs is by using API keys and secrets. This ensures that only the authorized clients can access the API endpoints. This article can guide you through the process of securing the Spring Boot API using the AP
6 min read